
Our editorial team individually chooses every product that is suggested on neatcupkit. We might get paid if you buy something after clicking on any of these links.
Your kitchen cabinets work harder than any other surface in your home. They face daily exposure to heat, moisture, grease, and constant handling. Without a proper finish, even the most beautiful wood or painted cabinets will show wear, stains, and damage within months.
A professional-looking finish transforms ordinary kitchen cabinets into stunning focal points. It protects your investment while creating a smooth, durable surface that withstands years of use. Whether you’re refreshing existing cabinets or completing a full renovation, the right finishing technique makes all the difference.
This guide walks you through every step of how to finish kitchen cabinets like a pro. You’ll discover which finishes work best, learn proven application techniques, and master the maintenance tips that keep your cabinets looking fresh for years.
Protection That Pays Off
Cabinet finishing creates a protective barrier against kitchen hazards. Steam from cooking, splashes of grease, and daily cleaning products can damage unfinished wood or poorly finished surfaces. A quality finish seals the wood, preventing moisture penetration that leads to warping, cracking, or staining.
The finish also protects against ultraviolet rays from windows and lighting. UV exposure fades wood and paint over time, leaving your cabinets looking worn and dated.
Enhanced Durability and Longevity
When you properly finish kitchen cabinets, they last decades longer than unfinished ones. The protective coat withstands repeated cleaning, prevents scratches from daily use, and maintains its appearance through years of kitchen activity. This durability makes finishing a smart investment that saves money on replacement or frequent touch-ups.
Professional Aesthetics
A smooth, even finish elevates your entire kitchen’s appearance. It creates visual consistency across all cabinet surfaces, hiding imperfections in the wood or previous paint jobs. Whether you choose paint, stain, or a clear coat, proper finishing techniques deliver that polished, high-end look that makes your kitchen feel more expensive and well-crafted.
Step 1: Prepare Your Workspace and Remove Hardware
Start by removing all cabinet doors and drawers. Take photos before removal to remember the original placement. Remove all hardware including hinges, handles, and drawer pulls.
Clean all surfaces with degreasing cleaner to remove cooking residue and dirt. Set up a well-ventilated workspace with adequate lighting. Lay doors flat on sawhorses or a work table covered with drop cloths.
Step 2: Sand for a Smooth Foundation
Sanding creates the smooth surface essential for professional results. Start with 120-grit sandpaper to remove any existing finish and smooth rough areas. Progress to 220-grit for the final sanding.
Sand with the grain on wood surfaces. For painted finish kitchen cabinets, sand lightly to create adhesion without removing all the previous finish. Clean all dust with a tack cloth before proceeding.
Pro tip: Use an orbital sander on flat surfaces to save time and ensure even results. Hand sand detailed areas and edges for better control.
Step 3: Apply Primer (When Needed)
Primer application depends on your chosen finish. Raw wood always needs primer before paint. Previously painted surfaces may need primer if you’re changing colors dramatically or switching from oil-based to water-based products.
Apply primer with a high-quality brush or roller in thin, even coats. Allow proper drying time between coats—typically 2-4 hours depending on humidity and temperature.
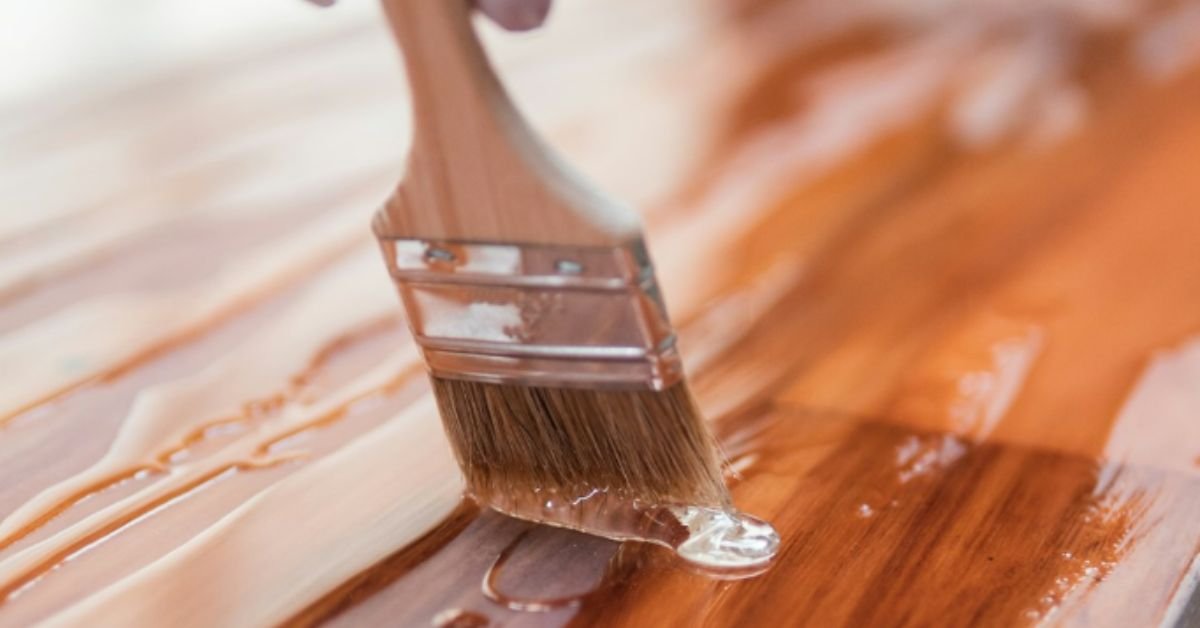
Step 4: Choose and Apply Your Finish
Paint Finish: Use a brush or roller designed for your paint type. Water-based paints dry faster and have less odor, while oil-based paints provide superior durability. Apply thin coats, maintaining a wet edge to avoid lap marks.
Stain Finish: Apply stain with a brush or cloth, working with the wood grain. Wipe excess stain after the manufacturer’s recommended time to achieve consistent color. Multiple light coats create more even results than one heavy application.
Clear Coat: Polyurethane, lacquer, or shellac protect natural wood while enhancing grain patterns. Apply with a brush or spray gun in thin, even coats. Sand lightly between coats with 320-grit sandpaper for smoothness.
Step 5: Master Proper Drying and Curing
Drying time differs from curing time. Paint may feel dry to touch in hours but requires days to fully cure and reach maximum durability. Follow manufacturer guidelines for recoat times and full cure periods.
Maintain consistent temperature and humidity during drying. Avoid dust contamination by keeping the workspace clean and covering drying pieces if necessary.
Paint vs. Stain: Making the Right Choice
Paint offers unlimited color options and completely hides wood grain for a modern, uniform look. It works well with any wood type and easily covers imperfections. Choose semi-gloss or satin paint sheen for easy cleaning and durability.
Stain showcases natural wood beauty while allowing grain patterns to show through. It works best on quality hardwood like maple, oak, or birch. Stain requires a clear protective topcoat for kitchen use.
Clear Coats and Protective Finishes
Polyurethane: The most durable option for kitchen cabinets. Water-based versions dry clear and resist yellowing, while oil-based polyurethane offers maximum durability but may amber over time.
Lacquer: Provides a hard, smooth finish that repairs easily. Professional spray application delivers the best results, though brush-on versions work for DIY projects.
Shellac: A natural finish that dries quickly and produces excellent adhesion. Less durable than polyurethane but easier to repair and maintain.
Specialty Finishes
Consider conversion varnish for ultimate durability in high-use kitchens. This professional-grade finish requires spray application but delivers exceptional resistance to heat, moisture, and chemicals.
For vintage or distressed looks, try milk paint or chalk paint followed by wax or polyurethane topcoats for protection.
Daily Cleaning Best Practices
Clean finished cabinets with mild soap and water using a soft cloth. Avoid harsh chemicals, abrasive cleaners, or scouring pads that damage the finish. Dry immediately after cleaning to prevent water spots.
For grease buildup, use a degreasing cleaner designed for kitchen use. Test any new cleaner on an inconspicuous area first.
Routine Maintenance and Touch-Ups
Inspect cabinets monthly for chips, scratches, or wear spots. Address damage promptly to prevent further deterioration. Keep leftover paint or stain for touch-ups.
For minor scratches in clear finishes, try furniture polish or paste wax. Deeper damage may require light sanding and reapplication of finish in the affected area.
Long-Term Care Strategies
Avoid excessive heat and moisture exposure by using exhaust fans during cooking. Install soft-close hinges and drawer slides to reduce impact damage from slamming.
Consider professional refinishing every 10-15 years for heavily used kitchens, or when the finish shows significant wear despite proper maintenance.
Learning how to finish kitchen cabinets properly transforms your space while protecting your investment. The combination of proper preparation, quality materials, and proven techniques delivers results that rival professional installations.
Start with thorough sanding and choose the right finish for your style and usage needs. Take time with each coat application and allow proper curing between steps. With patience and attention to detail, you’ll achieve that smooth, professional look that makes your kitchen the heart of your home.
Remember that finished kitchen cabinets are an investment in your home’s value and your daily enjoyment. Choose quality materials, follow proper techniques, and maintain your finished cabinets with care. The result will be beautiful, durable kitchen cabinets that serve your family for years to come.
You can use deglosser or liquid sandpaper on previously finished surfaces, but light sanding still provides better adhesion. Skip sanding only on surfaces in excellent condition when using specialty no-sand primers designed for this purpose.
Drying time varies by product and conditions. Paint typically dries to touch in 2-4 hours but needs 24-48 hours between coats. Full cure takes 7-30 days depending on the finish type. Plan accordingly for kitchen access during the process.
While not always necessary, a clear topcoat adds durability to painted cabinets. Use water-based polyurethane to avoid yellowing. This extra step significantly extends the life of your paint finish in high-use areas.
Clean the area thoroughly before touch-ups. For paint, feather the edges to blend with existing finish. For clear coats, sand lightly and apply thin coats, blending into surrounding areas. Always use the same product used for the original finish.
Yes, but preparation is key. Remove old finish completely for best results, especially when switching from paint to stain. Use appropriate primers when changing finish types to ensure proper adhesion and color accuracy.